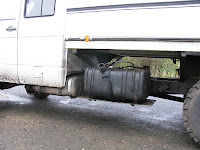
The king pin to lower suspension arm ball joint had a puncture to the rubber. I'd tried gluing it but it came undone, after that I injected extra grease every now and again. it could only be removed by taking out the half shaft first which put me off a bit, little did I know that the half shaft was trivial compared with the other problems.
Four weeks and £200 later it's fixed.
The bottom of the ball joint came off with the two hammer trick. The slotted nut on the top needed wacking with a chisel and a lump hammer, even when it moved it needed strong hammer blows. That was easy, the ball joint would not come out. So I decided to take it in to the workshop. Problem, the bolt connecting the lower arm to the tie rod would not budge. The garage would not come out so I called Roy. Next Saturday morning he arrived with a welding lance and a friend with a big hammer. The bolt came out and he took the arm away to separate the ball joint. The arm came back minus the ball joint which had been destroyed in the process.
Was it worth it?
 |
| BEFORE |
 |
| AFTER |
The parts:
 |
| Ball joint £30, locking plate £1 ring nut £20, yes really |
 |
| Bolt M16 190mm fine thread £24 from Italy (I was almost forced ot buy a back of 5) |
On the way....
 |
| I had to remove the suspension arm to get the old ball joint out. |
 |
| Ring nut in place, copper grease inside, paint outside |

 |
| The 190mm bolt also holds shock absorber |
 |
| All together and painted rustoleum red - bright. |
Was it worth it?
If I stayed in the UK, never far from a garage, then I would have been better leaving it. But as preparation for a big trip, to do some preventative maintenance without any time pressure and with help around perhaps it was worth it. And I learnt a lot.
What I learnt ...
- It's a harder job than I thought
- In fact, it's a much harder job than I thought
- The two hammer trick does work and its better than using the tools (that did not fit and went back to the shop)
- I learnt what a C-spanner is and where to borrow one from.
- The spanner won't fit on the slotted nut while the arm is in place, but a chisel will get it off.
- The long bolt holding the suspension arm and tie rod was rather difficult to move.
- Freezing did not work
- Drilling is not a good idea (the experts say it's a last resort and heat works better)
- Heat does work, but it needs a welding lance, not a small blowtorch.
- Even in a workshop the ball joint does not come out easily.
- The suspension bolt is hard to get hold of, the Iveco part came from Italy. And I nearly had to buy a pack of 5
- Don't try taking the half shaft out without dropping the suspension, the suspension arms are at the wrong angle (I punctured the CV boot and had to fit my spare one on)
- Use a home made puller to remove and insert the suspension arm to chassis bush. A short length of unistrut and a coach bolt worked well. hammering stressed the rubbers and was hard work.
- From Luke: The suspension bolts are intended to hold the parts together through tension in the bolt and friction in the mating surfaces, rather than shear forces on the bolt - so don't grease the surfaces!
- If I paint bits the day before I assemble it,the paint will be soft get messed up a bit.
- And I met Roy and had help and advice from Duncan at work.

Comments
Post a Comment